View responses within Inspera
- In Inspera, select the Grade tab, and click on the title of the relevant test.
- Go to the marking workspace to view the candidates' responses.

Note the options in the footer of the marking workspace to:
- A - view in fullscreen
- B - expand the marking screen (hide the menus)
- C - navigate between candidates
- D - navigate between questions
The footer also allows you to search by candidate number. To the left of the header, the currently selected candidate is shown. This candidate is selected globally - if you move between workspaces, the candidate remains selected.
If you want to explore the tools and functionality in Grade further, Inspera's 'Getting Started with Marking 2.0' video is a good place to start (available at the bottom of this user guide).
Print responses to a PDF
- In Inspera, select the Grade tab, and click on the title of the relevant test.
- Go to the Options drop-down.
- Click 'Print and download all submissions'.


Note the options in the print screen to:
- A - print responses to all questions or responses to a single question
- B - adjust the style of the PDF
- C - adjust what is included on the PDF
- D - download the selected responses as a single PDF or as separate files
You can also download the responses for a single candidate from the overview, results and marking workspaces. Click the ellipses in the row containing the relevant candidate.
A note on typed exams with supplementary uploads
Where students are presented with an Essay question (with a file upload allowed), the output will be two files. One file will contain any typed responses; one file will contain the PDF uploaded in response to the question (where applicable).
If you print all candidates' responses to ALL questions, as a merged file, all the typed responses will be shown, followed by all uploaded PDFs. Printing all candidates' responses to a SINGLE question, as a merged file, will instead provide a document where both parts of an individual candidate's response to the question are presented consecutively.
Store and share your PDFs securely
View attached files
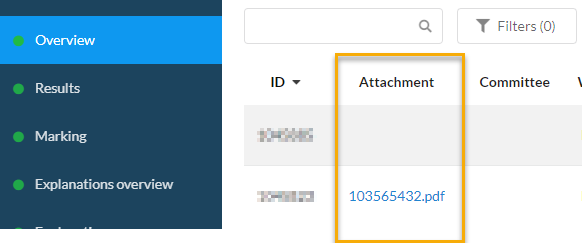
In the Overview workspace, the 'Attachments' column shows any documents attached to a student's submission by the Online Exams Support Desk.

Attachment column
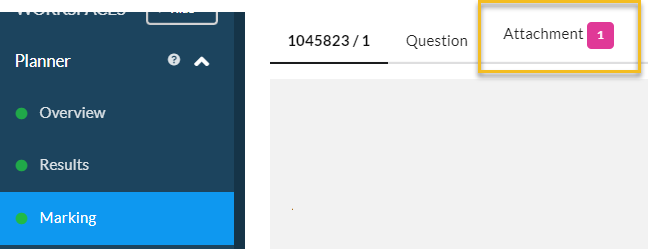
In the Marking workspace, an additional 'Attachment' tab will be displayed if there is an attachment present.

Attachment tab
The Online Exams Support Desk may attach an additional file to a candidate's submitted exam response if:
- the candidate encountered a technical issue uploading documents within their exam
- the candidate identified a substantive error in the file they submitted (e.g. it was the wrong file, a scan is unreadable, or there are pages missing)
A file will only be attached if the Proctors' Office (or E&A under delegated authority from the Proctors' Office) have given permission for it to be marked. If the file is intended to replace a previously uploaded document, the original document or response should be disregarded by the examiners.
Departments must not mark, or attach to Inspera, work sent to them directly by a student.